In optometry school, we are often required to purchase our equipment well in advance of being taught how to properly use it. Sure, schools host equipment fairs so that students can meet the company reps, learn about the products, and “try it out.” But often, we aren’t really sure what we’re doing yet. Kind of like being taken on a walk-through of the features of a helicopter you’re trying to buy…before you learn how to fly it.
Here’s a distillation of some of the lenses you’ll likely try out or use at some point and what I’ve used and liked (and why):
Most student lens kits are going to come equipped with a 20D, 90D, and 3 mirror gonioscopy lens at the bare minimum. While this will cover all your bases for sure, it isn’t necessarily the best for every student or every doctor. It’s a good starting point, but here is why I prefer different lenses (for everything!) and why. For the purposes of this article, I’ll be referencing Volk lenses since that’s what I use, but there are other lens companies that exist and do a great job.
BIO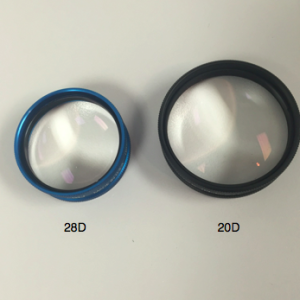
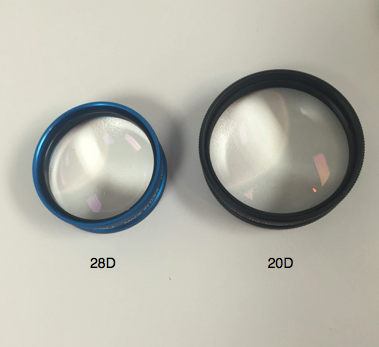
The 20D lens is the standard lens for most optometrists. It has a good combination of magnification, field of view, and lens working distance for most people. However, I found through trying different lenses through the “master kit” in second year is that I much prefer a 28D lens. For me (a 5’2” woman), the working distance being shorter is far more comfortable to me, in respect to distance from the patient’s eye to the lens, as well as distance from the lens to my headset. I find myself arching my back less with the 28D, and my hand hovers less since the lens is closer to the patient. In addition, the lens is smaller and easier to hold due to the smaller ring size. The kicker to me, however, and the reason that the 28D wins as the lens of choice for many retinal specialists, is that the field of view is increased in relation to the 20D. You gain about 10-15 degrees of field with the 28D but lose some magnification. It’s also worth noting that due to the higher power, the 28D works well on kids and patients who dilate poorly. The reason we do BIO is to reach the periphery, not to see details. I would rather make sure that I don’t miss a tear at the ora instead of a small dot heme at the equator I could easily pick up on the slit lamp. (One last note: if you get used to this lens like me, NBEO part 3 only offers a 20D and the Digital ClearField. Take the latter. It’s much closer in specs).
Another choice for BIO that is a good blend of the ring size of the 20D but the relative field of the 28D is the 2.2 Panretinal. I find that some students prefer this lens when they like the field of the 28D but don’t like the small ring. It allows a larger view and less scanning. I find that with either of these, I can have patients reclined or seated and still have an easier time reaching the periphery than with a 20D.
OS Tip: Practice BIO Using a Cereal Box
Slit Lamp Exam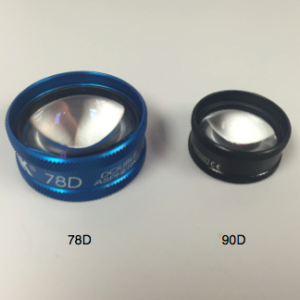
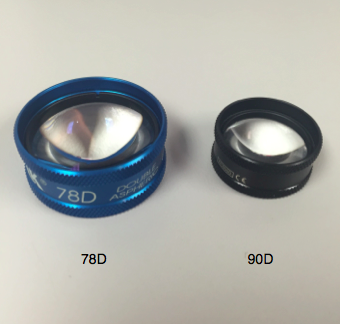
This is the category where there is enough variety to make your head spin. Most students purchase a 90D lens because it is “classic” and has a good mix of magnification and field of view. It can be used on a dilated or undilated pupil. I personally find that the ring size is too small for me to hold comfortably, and that I’m readjusting the lens constantly. The best “general diagnostic lens” for me (as 90-95% of my patients are dilated) is the 78D lens, as the larger ring size makes it easier to hold it steady, and with a larger lens you gain a larger field by default. The magnification of the 78D is larger than that of the 90D, so I find that I can ascertain more details of the nerve head, vessels, and macula with this lens, and pick up on more subtle changes that I feel I would miss with the 90D.
 Depending on your needs, there are plenty of other fundus lenses to choose from. The newest addition to my arsenal is the Super VitreoFundus (SVF) lens. I like the “small pupil” capability of this lens as well as the LARGE field I can get, even on undilated patients. It lets me increase the magnification of things I see in the far periphery on BIO with ease. Similar in specifications are the Superfield and Digital WideField lenses. Both are similar in their uses and specifications, but they are “super 90s” as they have the same mag as a 90D but much a greater field of view. My SVF has a smaller mag with large field, but can get in through a smaller pupil. This is more indicated in my current patient base (who sometimes dilate poorly). It should also be noted that these lenses need to be held relatively close to the patient’s eye to be focused well, but they work wonderfully on the undilated patient.
On patients with findings that you need to get a better look at (think: optic nerve head details, epiretinal membrane, macular edema), you want a higher magnification lens. The 78D lens works lovely for this purpose, but if you can grab a Super 66 (or its newer Digital 1.0 cousin) to try out for details, I recommend it. The beauty of this baby is that due to the math of the optics involved, the magnification factor is 1.0. This means that no matter what magnification your slit lamp is on, the mm setting you set your lamp on, this is the direct size. This is fabulous in glaucoma management because it can be used to directly measure the ONH, c/d, suspicious lesions/nevi, etc. It also provides the most superb clarity and stereopsis of any fundus lens I’ve tried. 60D is a “classic lens” with similar mag, but without the 1.0 factor.
OS Tip: 4 Quick and Easy Ways to Assess Optic Nerve Head Size
Gonioscopy Lenses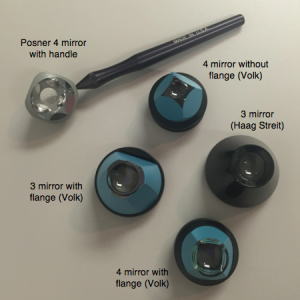
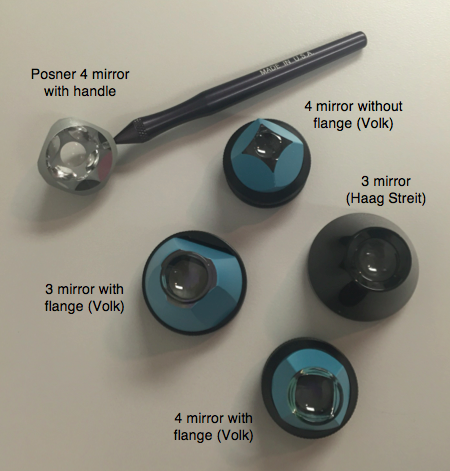
Three-mirrored, flanged gonioscopy lenses are required of almost all optometry students due to the fact that they are multi-purpose. The three-mirror lens is used to teach the gonioscopy procedure due to the flange adding stability on the eye while the student learns. In addition, this lens can be used on a dilated pupil to assess the far periphery and posterior pole in more detail than a BIO lens can assess. The downside to using the flanged lenses is that they are large and cumbersome to the patient, require celluvisc, and for a routine gonio exam, require rotation on the part of the examiner to all four quadrants of the eye.
Four-mirrored gonioscopy lenses are much faster and more efficient for gonio, as they contain only 4 bullet mirrors angled for the anterior chamber angle. They are available in flanged and non-flanged versions, but the non-flanged versions are less stable on the eye and have more of a learning curve. You can choose to buy one without a handle or with one (often referred to as the Posner lens), as well as a mini or pediatric version. After you perform your anterior segment evaluation, if you decide the angles are narrow and your patient needs gonio, perform Goldmann tonometry (which needs anesthetic). Then tell the patient to look straight and pop on the non-flanged lens. No celluvisc needed and no insertion/removal procedures. Once you become proficient at it, it can take less than 20-30 seconds per eye with a cooperative patient. With a flangeless lens, patients sometimes think it is similar to the 90D lens, since they are anesthetized and are oblivious. The flange adds stability, but also causes more patient anxiety. If you ever need to perform impression gonio, you can’t use a flange lens anyway. This is a rarely used and advanced skill but a very useful one that can open up suspected closed/narrow angles in times of crisis. However, I have found that a 4 mirrored, flanged gonio lens is a very useful tool to have around-since most patients look around during the procedure out of anxiety and the flange helps the stability of the eye and your hand. The anxiety of one drop of celluvisc is greatly overlooked by the benefit you gain by getting the procedure over faster when the lens is stable.
OS Tip: Choose the Correct Gonioscopy Mirror Using Your Thumb
Lens Ring Color
Something else that seems innocuous but may be annoying while learning difficult procedures is glare from rings. Students who choose to purchase colored ring lenses in light colors like gold or silver commonly complain of glare more than those who opt for standard black. I have several blue and several black, and given the chance I would swap out the blue rings. You can, but since these are medical devices regulated by the FDA, there is a charge involved so I’ve learned to look past it. My advice is to pick the black. Most companies will also offer free engraving for you as part of their student package. Just keep in mind if you’re like me (indecisive and/or want to try everything), resale values plummet on engraved lenses if you ever plan on trying to sell.
There’s nothing wrong with trying and loving the “tried and true” lenses. There is a reason they work well for many people. But if you’re anything like me, you’ll want to know if there is a better option out there for a different purpose. In addition, different people practice in different ways, with different specialties, retiring different equipment. As a student, get your hands on as many different lenses (and pieces of equipment for that matter), because student discounts don’t last forever!